
Sanding and polishing brings an old timber floor back to life and gives the room a shiny look. For that, you can hire an expert experienced in sanding and finishing or as a better and cheaper option, Do It Yourself (DIY)!
Despite that refurbishing a decolourized timber floor is a popular DIY project, it is easy to make costly mistakes in the process. In that case, the outcome would be a dubious floor or the worse, the whole flooring has to be replaced. Because hardwood floors are expensive, the nightmare of every home owner is to damage them as they are polished.
Whether you are going to hire a professional for restoring the timber floor or you prefer to Do It Yourself, there are some tips and precautions to take into the account. So, to refresh and old hardwood flooring, follow our great tips.
Overview of polishing timber floors
Timber floors are the ideal flooring for every home or building. They are durable, environment-friendly and easy to maintain. Not only their unique aesthetic and elegant wooden view appeals to every eye but they are manufactured in a variety of colors, shapes, and styles fitting into every decoration. Besides, the main advantage of timber floors is that they can be easily restored or refurbished by means of sanding followed by finishing.
If you are renovating the house or considering giving your building a vivid and incredible look, one of the best yet inexpensive solutions is sanding and polishing the timber floor. Polishing eliminates the outer layer of a timber floor subject to erosion over time and improves the quality and appearance of the surface. It can be also used removed some superficial surface scratches and water stains as well as surface imperfections.
Although some deep stains such as animal urine (the worse one) cannot be completely removed by sanding and polishing, it still worth a try.
Preparing the room
Getting the room ready before the start is a crucial step. Although it seems obvious, overlooking it will influence the final result or cause environmental or health problems.
• It is very important that you move any furniture out of the room. If the furniture is an integral part of the building or they cannot be moved out for reasons, make sure that all exposed parts are covered and sealed well so that they are not damaged during the sanding process.
• If the floor is covered by carpet, it has to be removed. If the carpet is cumbersome and heavy, the practical solution is to cut the carpet into small pieces by a sharp utility knife and carry them out of the room. Moreover, in some houses vinyl tiles or vinyl flooring is laid over the timber floor which are needed to be removed in advance of sanding.
• Inspect the floor for any loose boards and nail them down. Floor nails protruded above the surface can gouge out the sanding machine belt. Therefore, Search for any nails striking out of the surface and punch them at least 3-4 mm below the surface using a hammer and nail punch.
• Because the sanding is a very dusty work and the dust generated is very fine, it could damage the furniture and home appliance. Before sanding to start, turn off ventilation and cover all duct and grills with a plastic tape. Tape plastic sheets over power outlets, computer outlet, vent and pictures as well as the other electronic devices.
If you intend to polish the kitchen’s floor, consider moving the food to a safe place or sealing them from the dust and chemical components. To prevent the dust to penetrate the other room, seal the doorways with a tape. Since the floor under the door cannot be properly sanded even by opening and closing doors, it is recommended to remove doors opening into the room.
• Sweep and vacuum the room to remove the dust and debris from the floor. It is imperative to keep the window open while sanding and polishing process is going on.
• As it is said: “Safety is No Accident”. Put on safety glasses, earmuffs and dust musk, read safety instructions before you start
Overview of Sanding
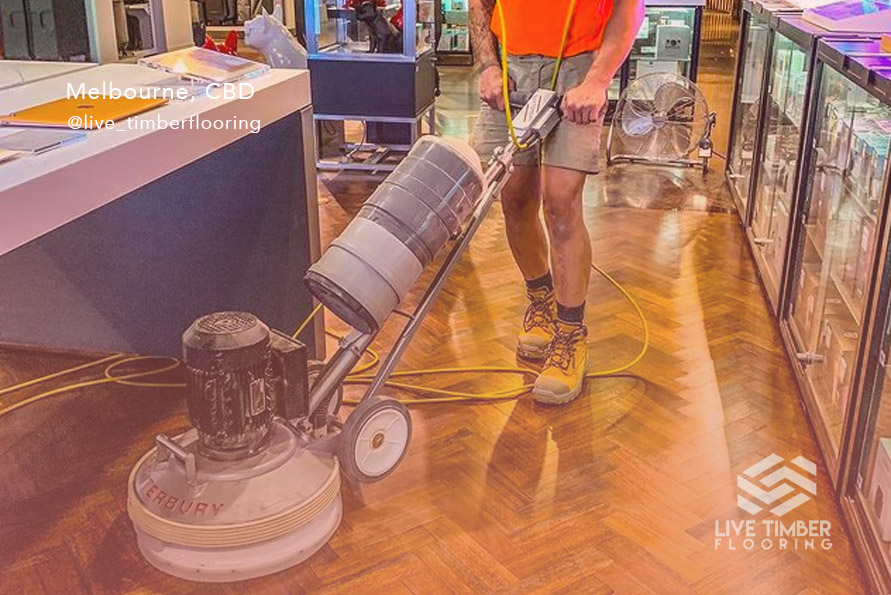
Sanding the timber floor is the most important step. All modern sanding projects employ specialized sanding machines. Two types of such machines required for the timber floor sanding are drum sander and edge sander machines.
A drum sander with a continuous belt is used to sand most of the floor which is preferred because they make no marks on the floor. The remaining hard to reach areas including edge corners and baseboards are sanded by a hand edge sander. The grit of sandpaper indicates how coarse or fine it is. The grid number is inversely related to the particle size of the sandpaper. A high grit number implies a fine sand paper and vice versa.
For example, a 24 grit sandpaper is a coarse one while 1000 grit is indicates a very fine sandpaper. The sanding of timber floor usually is started by a coarse sandpaper (For example a 24 grit sandpaper), followed by medium grit. The final stage is finishing the floor surface by a fine sandpaper.
If the floor is relatively new, skip the first stage and start with a medium grit. Selection of the grid sequence depends on factors like the age of the floor and the size of the final grit. The most common sequence of grit for timber floors are: 40-60-100.
The initial Sand, the Coarse Sand
Use a coarse sandpaper for the first stage. Start from one corner of the room and sand diagonally to the other corner. Repeat the process at least three times, then move on and finish the floor at 45 degrees to the floorboards. When you finished the entire surface, use an edge sander with the same grit to finish the corners. However, it is difficult to remove finish form some corners and baseboards even by an edge sander. Attack these areas by a sandpaper wrapped scrapper. Don’t forget to remove dust between the stages by vacuuming the room.
The Medium Sand
Although the initial grit removes the outer layer and flattens the floor, you need the medium sand to polish off the scratches made in the previous stage. The method of sanding is the same except that this time the sanding is performed along the floorboards.
The final Sand, the finish Sand
The quality of the final step of sanding determines the smoothness of the timber floor. Prior to this stage, fill all holes in the floor with a water-based puffy and let them dry. Finishing a timber floor with fine sandpaper is carried out in the same manner as the medium sand. Repeat the work until you are satisfied with the quality and smoothness of the floor.
The floor finish
There are generally two types of floor finishes: water based and oil based. Water-based polyurethane varnishes are more desirable due to less odor and time required to cure. They are categorized by the level of how shiny there are. Glossy varnishes shine like a mirror and reflect most of the incoming light beams. In contrary matte and semi-matte floors, emit the less light from the surface and let the decoration stand out in the view.
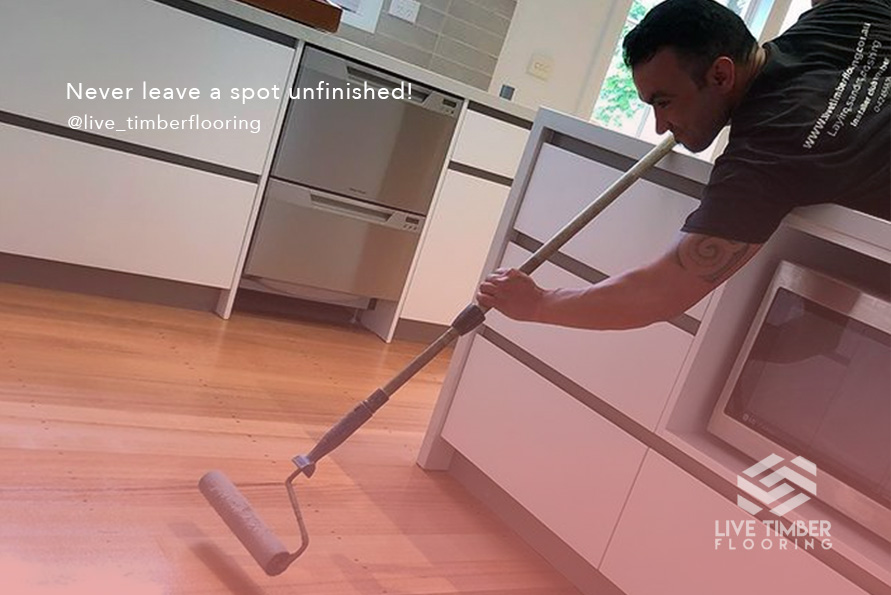
All types of finishes are prepared by mixing, may be as simple as shaking the container or mixing with a hardener. The best guide for the mixing varnishes is the manufacturer’s instructions. Apply the varnish at the timber floor surface by a special varnish brush and smooth brush strokes to prevent bubble formation. Room temperature between 12 to 25 Celsius degrees is preferable during the varnishing operation. Always start brushing at one corner and end up it on the opposite corner of the room and consider how to leave the room at the end of the work.
The drying time of varnishes differs by the type and manufacturer. Before applying the subsequent layer of the varnish make sure that current layer is dried well. The curing time of varnishes is usually mentioned in the manufacturer instructions and printed on the container label.
Sanding and polishing provides an economic method to restore the incredible look of an aged timber floors. The step for that includes getting ready the room, sanding the floor and finishing the surface by application of varnishes.
Sanding the main task and usually is achieved with a multi-stage approach. Taking into account our tip and tricks helps a DIYer easier and without spending a lot money.